I recently saw these tassel trimmed curtains on Serena and Lily's website, and fell head over heels in love. Seeing as how our home decorating budget is seriously lacking until Joe starts working this August, I knew that I'd have to keep on dreamin'. Lucky for me, I enjoy a good DIY project and get a sick enjoyment out of doing things myself and saving so much money! Plus, it earns me extra points with the hubs! Anyway, these were so incredibly easy to make and were a fraction of the price...and I think they actually look more expensive that the Serena and Lily version...score!
I found these grey linen panels at Home Goods, which is not somewhere where I usually go searching for curtains. I was there to find baskets for our bathroom, and accidentally found these beauties. I'm not a huge fan of curtains with grommets, but I was desperate to find some linen type panels for this little project. Now that they are all done, I actually like the grommets! They were around $14.99 for a package of 2 panels...crazy, right?? Our last apartment had really bright, orange curtains...so I knew I wanted something a little more subdued for the loft.
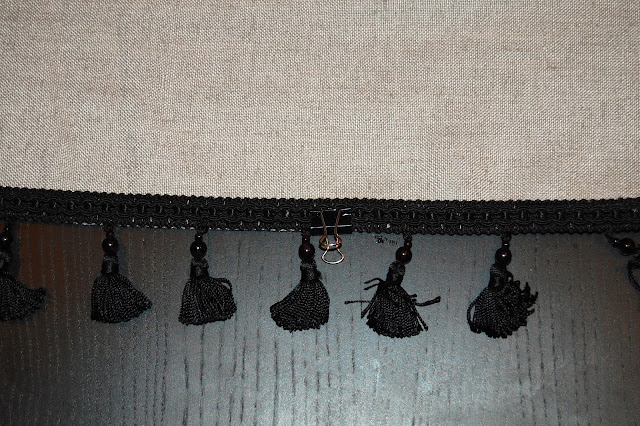
I went to JoAnn Fabrics and found this beaded tassel trim, and got about 9.5 yards to trim the inside edges of 4 curtain panels. I had a coupon, so I ended up spending about $40ish on the trim and fabric glue. I have a sewing machine, but have no idea how to use it, so I used this awesome Fabric-Tac glue and it worked just fine! I'm pretty sure it would be all zig-zaggy if I tried to sew it!
I laid out each panel on our dining room table and made sure it was straight. Then, I laid out the trim on the curtain panel and cut it to fit the length of the edge. I couldn't find my straight pens since a ton of my stuff is still packed in boxes, so I used safety pins to keep the trim in place before I glued it down.
After the trim was cut to size and pinned on the panel, I started gluing on the trim in about 6" sections...anything more than that, the glue would dry too quickly and made it hard to handle. Once this glue dries, it's permanent, so take your time and do it in small sections...making sure to pull the curtain fabric taught so you don't have permanent wrinkles.
I used these little clips to keep the trim on the fabric just in case it shifted before the glue was dry, but I don't think I really needed them since it was just lying flat on the table.
After I was done gluing the trim on, I just left it draped over the table and a chair until I was certain that everything was totally dry!
Then, voila! Gorgeous tassel trimmed curtains that cost less than one panel at Serena and Lily!
Here's a sneak peek at the back wall of the living room. Love, love, love the brick. But hate that random white thing on the wall, and the fact that I can't just hang art wherever I please. But anyway, that's a whole 'nother post for a whole 'nother day. I'm hoping to do a little gallery wall around the TV, but we will see! Also, if it were up to me, I would have had the curtain rod installed closer to the ceiling, but we had to do it at the top of the wood moulding because of the brick. You win some, you lose some!
The curtains are Charlie approved! I don't love this trunk in front of the window, but it's his favorite spot where he spends 99% of his day, so I hate to move it!


I adore these! I want to make some too!
ReplyDeleteAhh, I wish I was crafty like this. They look great!
ReplyDeleteLOVE!
ReplyDelete